

Table of Contents
- How to Brew Specialty Coffee at Home: The Core Variables
- Method 1: Pour-Over with a Gooseneck Kettle
- Method 2: French Press Immersion Brewing
- Method 3: AeroPress for a Clean, Fast Cup
- The Specialty Coffee Water-to-Coffee Ratio Explained
- Coffee Grind Size Chart for Brewing Methods
- Picking the Best Coffee Beans for Home Brewing
- Common Brewing Mistakes to Avoid
- Frequently Asked Questions
Last Updated: September 7, 2026
Specialty coffee is only as good as the method you use to brew it. The best ways to brew specialty coffee balance extraction, time, and temperature to highlight the unique character of single-origin beans. At Lux Brew Coffee Co., we roast every batch to order, ensuring peak freshness. The equipment and technique you choose matter just as much as the freshness of the beans themselves. Below, we'll walk through six proven brewing methods, the core variables that control your cup, and the common mistakes that flatten flavor.
How to Brew Specialty Coffee at Home: The Core Variables
Brewing specialty coffee at home comes down to controlling four variables: grind size, water temperature, coffee-to-water ratio, and time. Getting these right unlocks sweetness and clarity; getting them wrong produces bitterness or sourness, regardless of bean quality.
Why Fresh Beans and Water Quality Decide Your Cup
Freshly roasted beans and clean water are the foundation of any good brew. Coffee is mostly water, so if your tap water tastes off, your cup will too. But "clean" is only half the story: the minerals dissolved in your water are active participants in extraction. Water that is too hard can dull acidity, while soft water may produce a flat, weak cup. Many home brewers switch to filtered water and notice an immediate improvement in clarity and sweetness.
The Specific Minerals That Matter: Magnesium and Calcium
Most brewing guides stop at temperature, but the real variable is the mineral profile of your water. Magnesium and calcium ions bind to the coffee's flavor compounds and pull them into the cup. Magnesium is the more efficient extractor, pulling out bright, fruity acids and enhancing sweetness. Calcium contributes more to body and a rounder mouthfeel. Water deficient in both, such as distilled or heavily softened water, will produce a hollow, flat cup no matter how good the beans are.
Sodium, on the other hand, is an extraction antagonist. Water softeners often swap calcium and magnesium for sodium, which is why softened tap water makes coffee taste flat and salty. If your home has a whole-house water softener, brew with bottled spring water or a remineralized reverse-osmosis system instead.
The Practical Fix: The Third Wave Water Approach
A common pattern among specialty coffee shops and obsessive home brewers is to start with distilled or reverse-osmosis water and add back a precise mineral blend. Products like Third Wave Water sell pre-measured packets designed to be added to a gallon of distilled water, formulated to mimic the ideal mineral profile found in the water of cities historically known for great coffee. One packet costs roughly $1.50 per gallon.
If you are not ready for that level of control, a simpler benchmark is to look for bottled spring water with a total dissolved solids (TDS) reading between 100 and 150 parts per million. If your tap water is moderately hard, a basic carbon filter like a Brita will remove chlorine and off-flavors while leaving enough minerals for extraction. The key is to avoid starting with water that is either completely stripped or excessively hard.
The Sensory Feedback Loop: How to Taste the Difference
Changing your water chemistry is only useful if you can taste the result. Brew the same coffee twice, once with your tap water and once with a remineralized water, then taste them side by side. Focus on three attributes: acidity, which should taste like a bright, crisp fruit note rather than a sharp, sour bite; body, the weight and texture of the coffee on your tongue; and sweetness, which should emerge as a round, caramel-like quality that balances the acidity. If the remineralized cup tastes noticeably sweeter and more vibrant, your water was the bottleneck.
This feedback loop is the same one professional roasters use in their cupping labs. By isolating one variable at a time and tasting deliberately, you build a mental map of how each brewing decision affects the final cup.
Method 1: Pour-Over with a Gooseneck Kettle
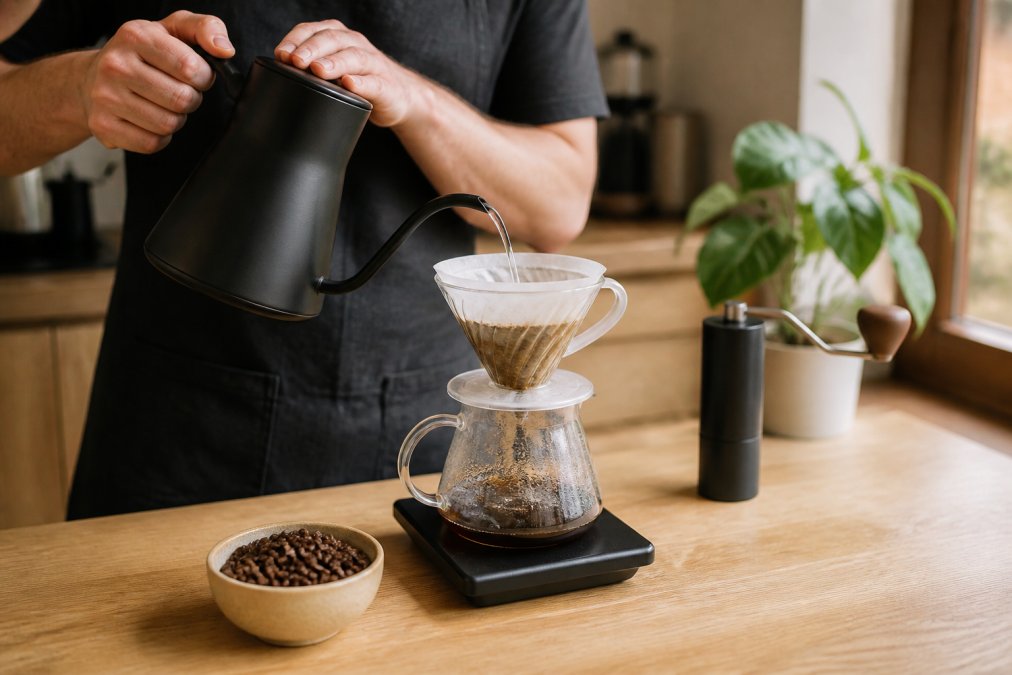
Pour-over brewing is the best way to highlight the bright, floral, and acidic notes in specialty coffee. A gooseneck kettle gives you precise control over flow rate, letting you saturate the grounds evenly without channeling.
To brew with a Hario V60 or similar dripper, start by placing a paper filter in the cone and rinsing it with hot water. This removes papery flavors and warms the brewer. Add your ground coffee at a medium-fine setting, then start a timer. Pour just enough water to saturate the grounds, about twice the coffee weight, and let it bloom for 30 seconds. Continue pouring in slow, circular motions, keeping the water level steady. The total draw-down time should land between 2:30 and 3:30. A ceramic dripper like the Hario V60 Ceramic Dripper retains heat well, which helps keep slurry temperature consistent through the brew.
Method 2: French Press Immersion Brewing
The French press produces a full-bodied, heavy-textured cup by keeping coffee grounds fully immersed in water for the entire brew. This immersion method retains natural oils and fine particles that paper filters trap, giving you a richer mouthfeel.
The Bodum Chambord French Press is a classic choice. Use a coarse grind, roughly the size of kosher salt, to avoid over-extraction and excessive sediment. Add coffee and hot water at a ratio of 1:15, stir gently to ensure all grounds are saturated, and let it steep for four minutes. Press the plunger down slowly and pour immediately. Leaving the coffee sitting on the grounds after pressing continues extraction and pushes the cup toward bitterness.
Method 3: AeroPress for a Clean, Fast Cup
The AeroPress is the most forgiving brewer for beginners and travelers who want a clean cup without the fuss. It uses air pressure to push water through a micro-filter, producing a smooth, sediment-free brew in under two minutes.
The AeroPress Original works with a medium-fine grind. Invert the chamber, add coffee and water, stir for 10 seconds, then press for 30 seconds. Because the brew cycle is short, you can experiment with higher temperatures and finer grinds without pulling harsh bitterness. Cleanup takes seconds, and the durable plastic build makes it ideal for camping or office desks.
The Specialty Coffee Water-to-Coffee Ratio Explained
The specialty coffee water-to-coffee ratio is the single easiest adjustment you can make to fix a disappointing cup. A ratio of 1:16, meaning 1 gram of coffee to 16 grams of water, is a reliable starting point for pour-over and drip methods. For immersion methods like French press, a slightly stronger 1:15 ratio works well.
Use a scale rather than a scoop, since bean density varies by roast level and origin. If the cup tastes weak and sour, grind finer or increase the coffee dose. If it tastes harsh and dry, grind coarser or dilute slightly. The National Coffee Association brewing guide recommends starting with two tablespoons of coffee per six ounces of water, which aligns with a 1:16 to 1:18 ratio depending on your equipment.
Coffee Grind Size Chart for Brewing Methods
Grind size controls how quickly water extracts solubles from the coffee. A coffee grind size chart for brewing methods is essential because each brewer requires a different surface area. Too fine a grind in a French press leads to over-extraction and silt; too coarse a grind in an espresso machine produces a thin, sour shot.
| Brewing Method | Grind Size | Texture Reference | Brew Time |
|---|---|---|---|
| Pour-Over (V60) | Medium-Fine | Table salt | 2:30-3:30 |
| French Press | Coarse | Kosher salt | 4:00 |
| AeroPress | Medium-Fine | Table salt | 1:30-2:00 |
| Drip Machine | Medium | Sand | 4:00-6:00 |
A burr grinder is non-negotiable for consistent results. Blade grinders produce uneven particles, which means some coffee over-extracts while the rest under-extracts. The Baratza Encore Conical Burr Grinder offers 40 grind settings, enough range to dial in any method above.
Picking the Best Coffee Beans for Home Brewing
The best coffee beans for home brewing are freshly roasted, specialty grade, and traceable to a specific farm or region. Look for a roast date on the bag rather than a "best by" date, and aim to brew within two to six weeks of roasting. Single-origin beans from regions like Ethiopia or Colombia offer distinct tasting notes that shine through with the right brew method.
At Lux Brew Coffee Co., we source specialty grade beans from ethical family farms and roast every batch to order, shipping within hours to lock in peak freshness.
Common Brewing Mistakes to Avoid
Most brewing problems trace back to a handful of fixable errors. The most common mistake is using stale beans, which produce a flat, cardboard-like cup no method can save. The second is inconsistent grind size, which creates simultaneous over-extraction and under-extraction in the same brew. Finally, many home brewers pour water that is too hot, scalding the grounds and pulling harsh bitterness.
Water temperature should sit between 195°F and 205°F, or about 30 seconds off a full boil. If you do not have a gooseneck kettle with temperature control, let the kettle rest after boiling before pouring. Agitation matters too: stirring too vigorously in a pour-over can cause channeling, where water finds a path through the grounds and leaves the rest under-extracted. Pour gently, keep your timing consistent, and change one variable at a time when troubleshooting.
Diagnosing Your Brew by Taste: The SCA Cupping Framework
The Specialty Coffee Association (SCA) uses a standardized cupping form to evaluate coffee across ten attributes, but you do not need a formal scorecard to troubleshoot at home. A simplified version focuses on the three most diagnostic attributes: acidity, body, and sweetness.
If the cup tastes sour, sharp, or salty: This is the signature of under-extraction. The water did not pull enough soluble material from the grounds, leaving behind the acids that extract first. The fix is to grind finer, increase your brew time, or raise the water temperature slightly.
If the cup tastes bitter, dry, or astringent: This is over-extraction. The water pulled too much, including the harsh compounds that dissolve last. The fix is to grind coarser, shorten the brew time, or lower the water temperature.
If the cup tastes flat, hollow, or one-dimensional: This is usually a water chemistry issue or stale beans. If the coffee has no distinct acidity or sweetness, the water likely lacks the magnesium and calcium needed to pull those compounds out.
The Sink Test: A Quick Check for Extraction Evenness
Before you change any variable, look at the bed of grounds after brewing. A well-extracted pour-over will have a flat, even bed with no deep craters or channels. If you see a hole punched through the grounds, water channeled through that path and bypassed the rest of the coffee, leaving it under-extracted. This is almost always caused by pouring too aggressively or stirring too vigorously during the bloom.
For immersion methods like French press, the sink test is different. After pressing, examine the spent grounds. They should look uniform in color, like wet sand. If you see patches of lighter, drier-looking grounds mixed in, those areas were not fully saturated, which means you did not stir thoroughly enough after adding water.
The One-Variable Rule and How to Keep a Brew Log
The fastest way to improve is to change one variable at a time and taste the result. If you change grind size and water temperature simultaneously, you will not know which adjustment caused the improvement. Keep a simple brew log with five fields: coffee dose, water volume, grind setting, water temperature, and brew time. After each cup, write a one-line tasting note.
The Budget-Friendly Diagnostic: A $10 Investment
You do not need a $200 refractometer to measure extraction. A simple kitchen scale with 0.1g accuracy, available for under $15, is the single most useful diagnostic tool. Weigh your coffee dose and your water pour to confirm your ratio is correct. Most home brewers who complain about inconsistent cups discover their scoop-based dosing varies by 20 percent or more from brew to brew.
Frequently Asked Questions
What is the ideal water temperature for brewing specialty coffee?
Aim for water between 195°F and 205°F. Water that is too hot will scorch the grounds and cause bitterness, while cooler water leads to sour, under-extracted coffee. If you do not have a temperature-controlled kettle, bring water to a boil and let it rest for 30 to 45 seconds before pouring. This simple step protects the delicate flavors in specialty beans.
Why is the coffee-to-water ratio important for specialty coffee?
The ratio determines brew strength and extraction balance. A standard starting point is 1 gram of coffee to 16 grams of water, or about 60 grams of coffee per liter. Adjust toward 1:15 for a bolder cup or 1:17 for a lighter, tea-like body. Using a scale ensures consistency, which is the fastest way to improve your results with any brewing method.
What grind size should I use for a pour-over brewer?
Pour-over brewers like the Hario V60 need a medium-fine grind, similar to table salt. The water passes through the filter relatively quickly with this size, allowing for proper extraction without clogging. If your brew finishes too fast and tastes sour, try a slightly finer setting. If it takes too long and tastes bitter, coarsen the grind.
How is brewing specialty coffee different from regular coffee?
The main difference is attention to detail. Specialty coffee focuses on the entire process, from ethical sourcing and roasting to order, to precise brewing variables like grind size, water temperature, and the coffee-to-water ratio. This approach highlights unique tasting notes and avoids the bitterness often found in mass-market coffee, resulting in a cleaner, sweeter, and more complex cup.